
So, I know this is a photo project blog, but I've been bitten by the crafting bug and want to share my first creation! This is so cute and fun to make right before St. Patty's Day! I found this wreath on another blog, http://www.alittletipsy.com, but had to post my adventure here after I made it :) Plenty of pictures, though!
For this, you will need:
- Large piece of styrofoam
- Two shades of green fabric (About a yard of each)
- Serrated knife
- Scissors
- White Glue
- Pen
- Hot glue gun
- Ribbon
- Heart template (My template was 6x6 inches for a 16" finished wreath)

Take both shades of green fabric and cut into 2x2 inch squares. I cut out a lot of squares to start with, then more later as needed.


Now you're ready to get gluing! Wrap a fabric square around the end of your pen, dab it in the white glue, and stick to the styrofoam using the pen to place it in a rose-like shape. I found it helpful to push lightly into the styrofoam to make it stay.

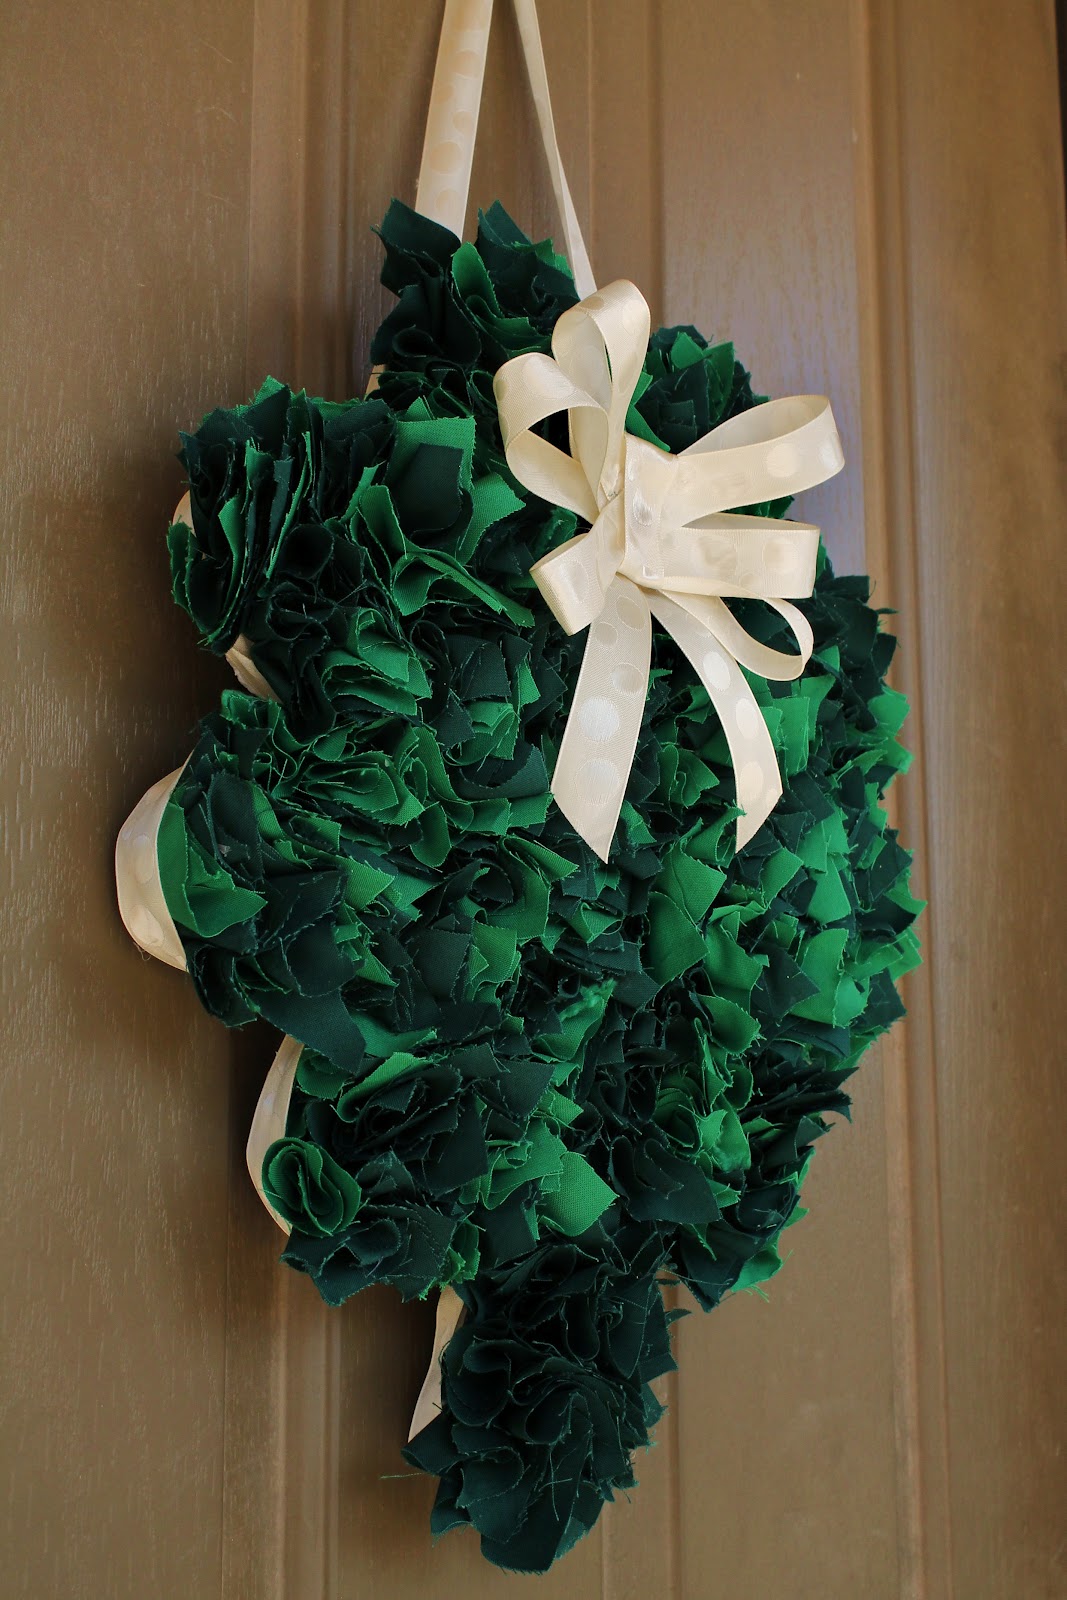
Continue doing this, randomly placing the different shades of green, until the heart is covered. Glue the pieces close together to achieve a dense look and feel. For the stem, I chose to use only dark fabric squares in order for it to stand out from the rest of the shamrock.
 |
| Heart/Leaf |
 |
| Stem |
The sides of the hearts should have the styrofoam still exposed for hot gluing the pieces together.

Once all five pieces are covered, take the hot glue gun and carefully glue the exposed sides together to create the shamrock. Extra fabric pieces may be needed to fill in any gaps. I also trimmed some parts of the fabric to enhance the shape. Once dry and to your liking, take your ribbon and glue around the edges of the entire shamrock to cover the white styrofoam. Much prettier that way! Next, add the ribbon to hang it with. Hot glue the ends of a piece of ribbon to the back of the shamrock to create the loop for hanging. The last step is to add some sort of personal touch. I made a bow for mine, but add anything you'd like..or keep it as is! :)
No comments:
Post a Comment